
Get Started with Modelling
Your First BPMN Diagram in Flower BPM
Get Started with Modelling
Want to bring structure to your workflows and document your business processes in Jira?
Flower BPM lets you model BPMN processes, store them in a central repository, and ensure compliance—all within Jira.
This guide works for Jira Cloud and Jira Data Center. It walks you through creating your first BPMN diagram in Flower.
Step 1: Make Sure Flower Is Set Up
Before you start modelling, Flower must be configured in Jira.
Flower does not store data separately. Everything is stored as Jira work items:
- BPMN models are Jira work items that keep all versions of a process.
- Process instances are created as Jira work items whenever a process is executed.
- Tasks within a process are Jira work items too, so you can manage them with your usual Jira workflows.
To know where to create these work items, Flower needs a Jira space and a work type for each of them. An administrator defines these in the Flower Settings: one space, and one work type each for models, process instances, and tasks.
If you are not an admin, ask your Jira admin to configure Flower before you continue.
📌 You can find the details in the setup guide. For now, let’s start modelling!
Step 2: Create Your First BPMN Model
Now that Flower is set up, let’s create your first process model.
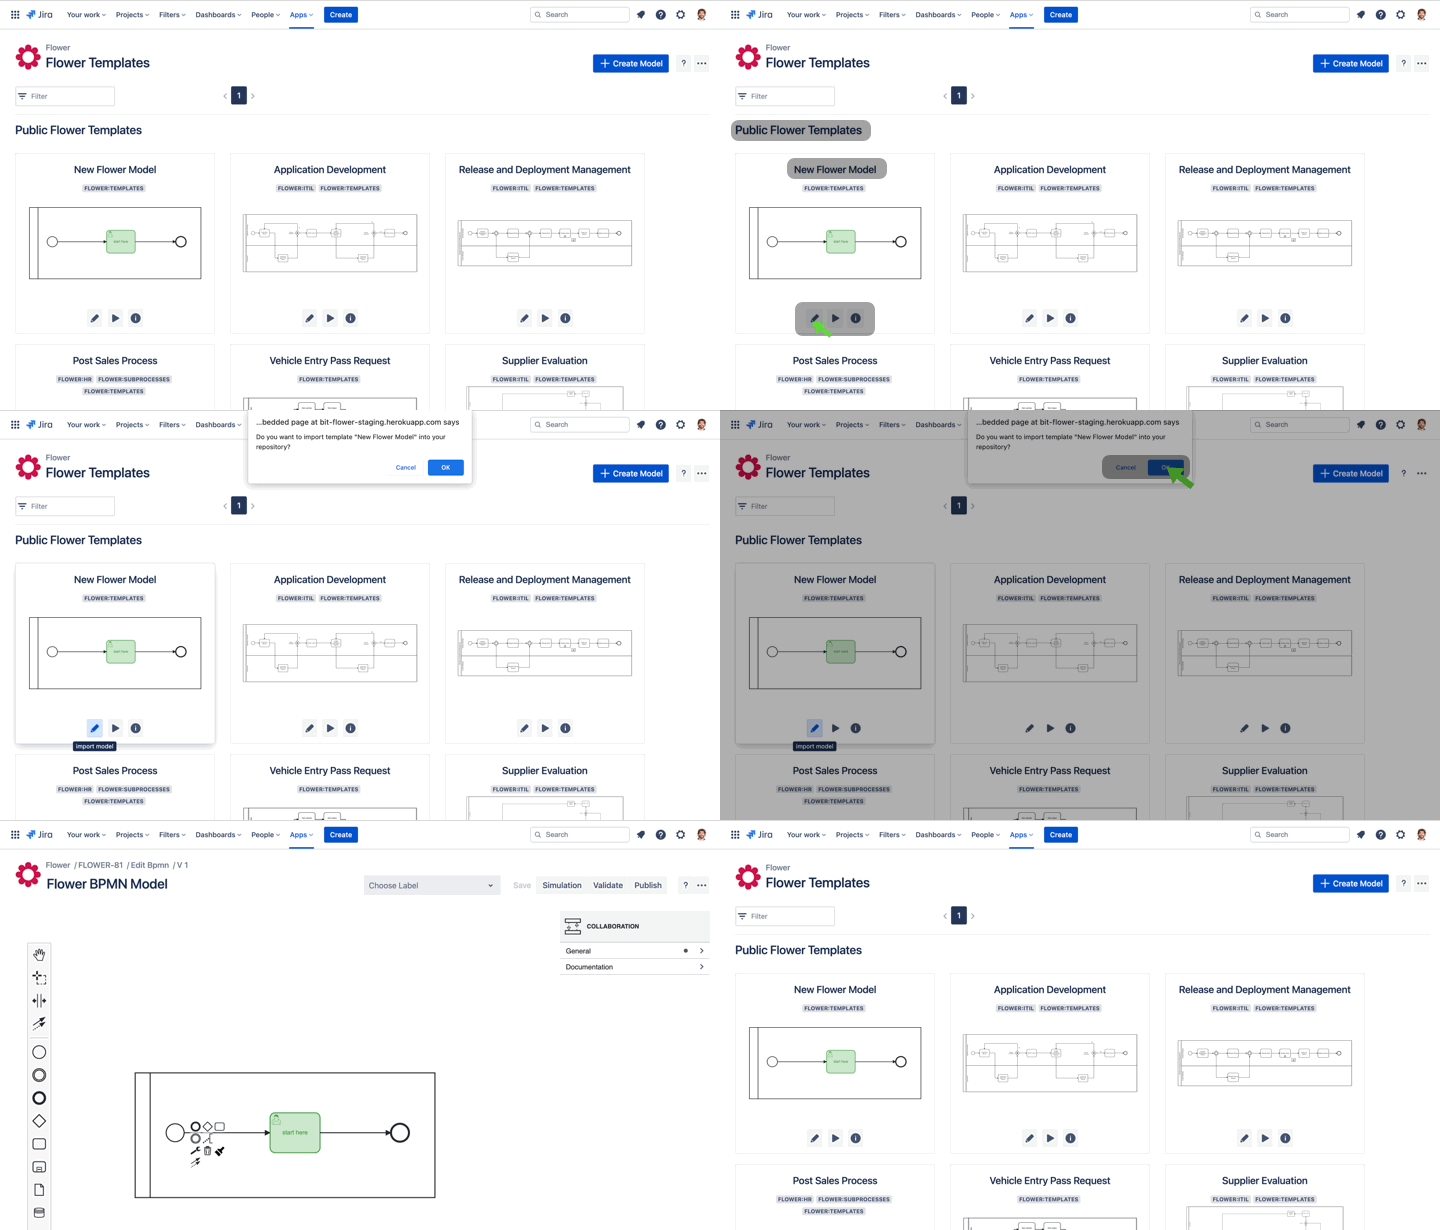
- Open the Flower BPM app in Jira.
- Click “Create Model”.
- Name your process (for example, “Employee Onboarding”).
- Click “OK”. Flower opens the BPMN editor.
You now have a blank BPMN canvas. Click the start event (the thin circle) in the middle of the canvas and build your first process with the context pad:
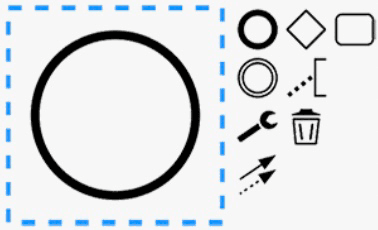
- Click the circle to the right to start building.
- Click or drag a rectangle to create a task. Type to name it.
- Create an end event by selecting the thick circle.
Start from Scratch or Use a Template
You do not have to start from scratch. Choose a model from the Template Library to kick-start your work with predefined workflow patterns:
- Automatable templates are preconfigured BPMN models that the process engine can execute.
- Documentation templates are meant for manually tracked workflows. Each activity has a play button that creates a linked Jira work item without automation.
Templates save time and apply best practices from the start.
Step 3: Design Your Process
A BPMN model describes a business process with tasks, gateways, and events.
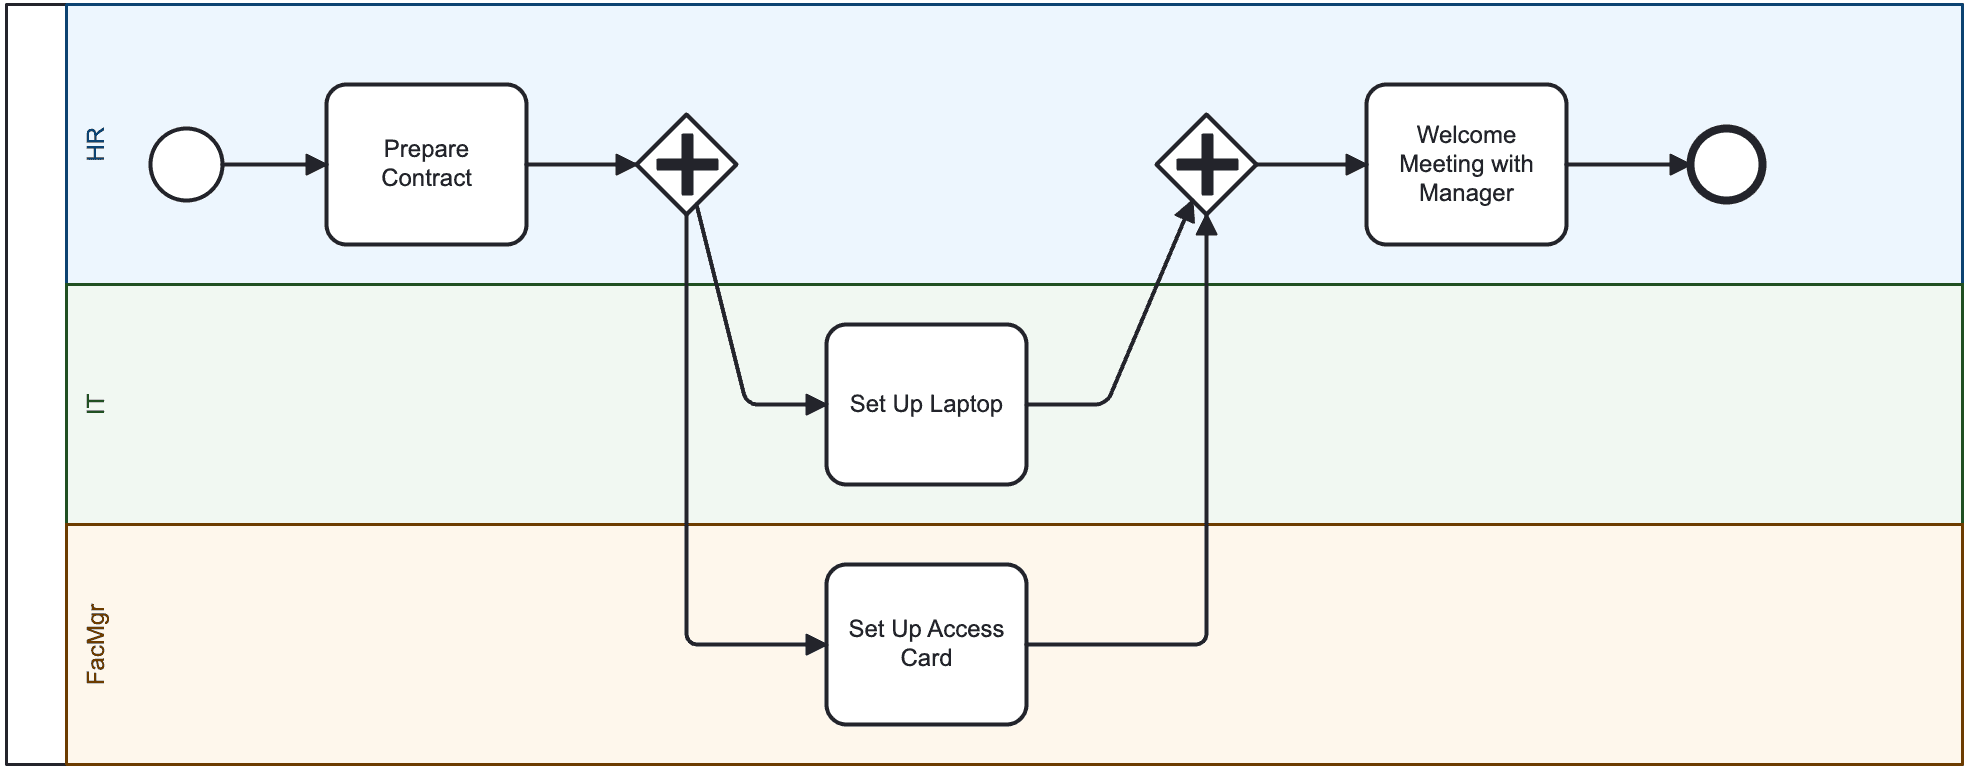
Let’s build a simple Employee Onboarding process:
- Start Event → The process starts (for example, a new employee joins).
- User Task → A work item for HR (for example, “Prepare Contract”).
- Parallel Gateway → Splits the flow, so that HR and IT work in parallel.
- Two User Tasks → One work item each (for example, “Set Up Laptop” and “Set Up Access Card”).
- Parallel Gateway (join) → Waits until both parallel tasks are done before the process continues.
- User Task → The final step (for example, “Welcome Meeting with Manager”).
- End Event → The process is complete.
Your process should now look something like this:
Good to Know
- Place elements with drag & drop and connect them with arrows.
- The example uses swimlanes to make responsibilities clear. To add them, drag the Swimlane Pool from the left toolbox onto the canvas, divide it into lanes, and name each lane. Lanes also drive task assignment, see Swimlane Assignments.
- You can change the colors of all elements, including swimlanes, to make responsibilities easier to see.
- You can use all elements of the BPMN standard, but only a subset is supported for automation in Jira. See the list of supported elements.
🔹 Pro Tip: Click an element to edit its properties, rename tasks, or configure assignments. For tasks and swimlanes, you can also set the Jira space and work type here, see User Tasks. To see how tokens move through your model, use the token simulation.
Step 4: Enhance Your Model
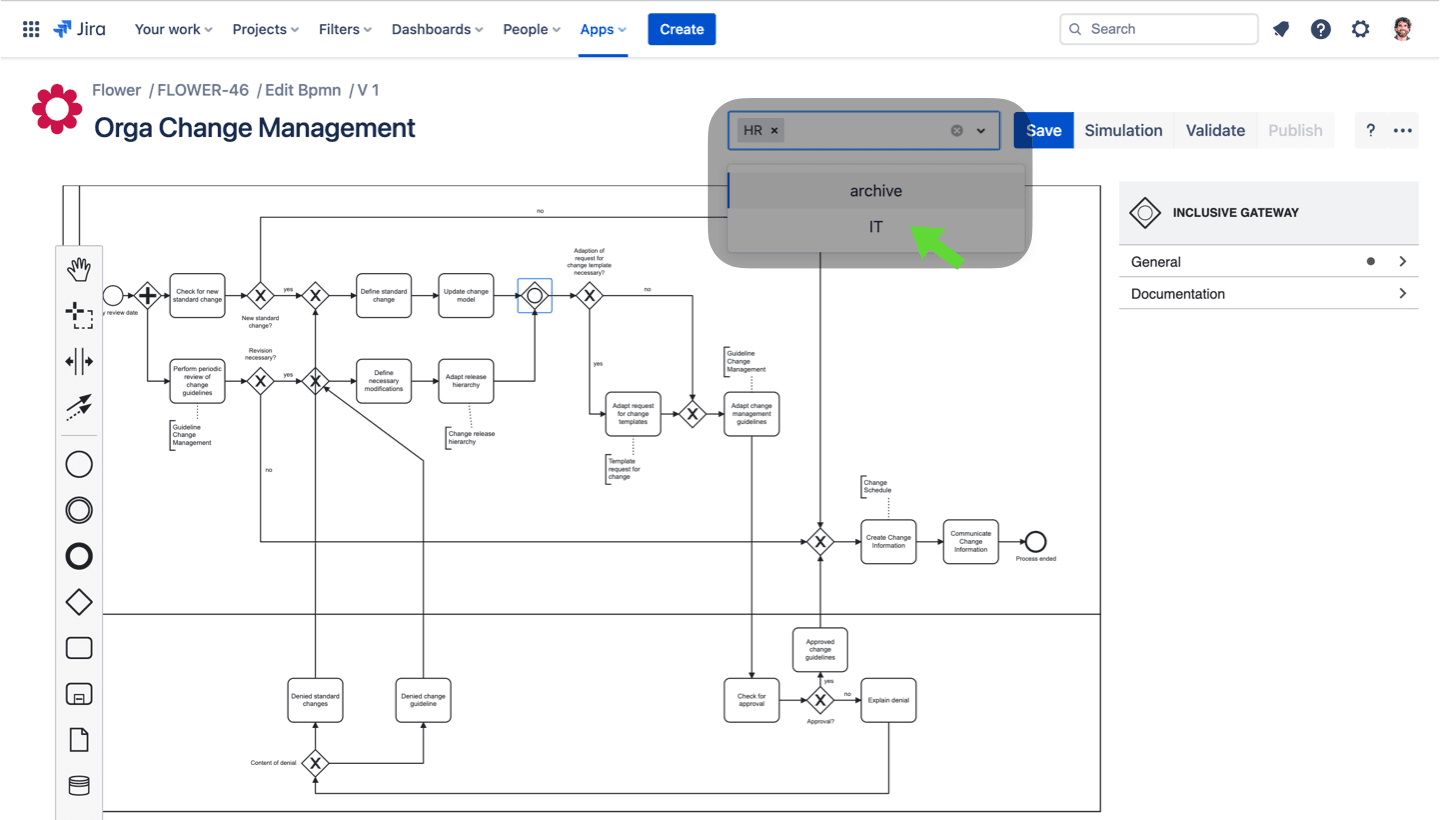
Add Jira Labels
Labels in Jira work like tags. Use them to categorize and filter your process models.
You can later use them in Jira JQL queries to keep your repository organized.
Use the “archive” label to hide a process model from your repository page.
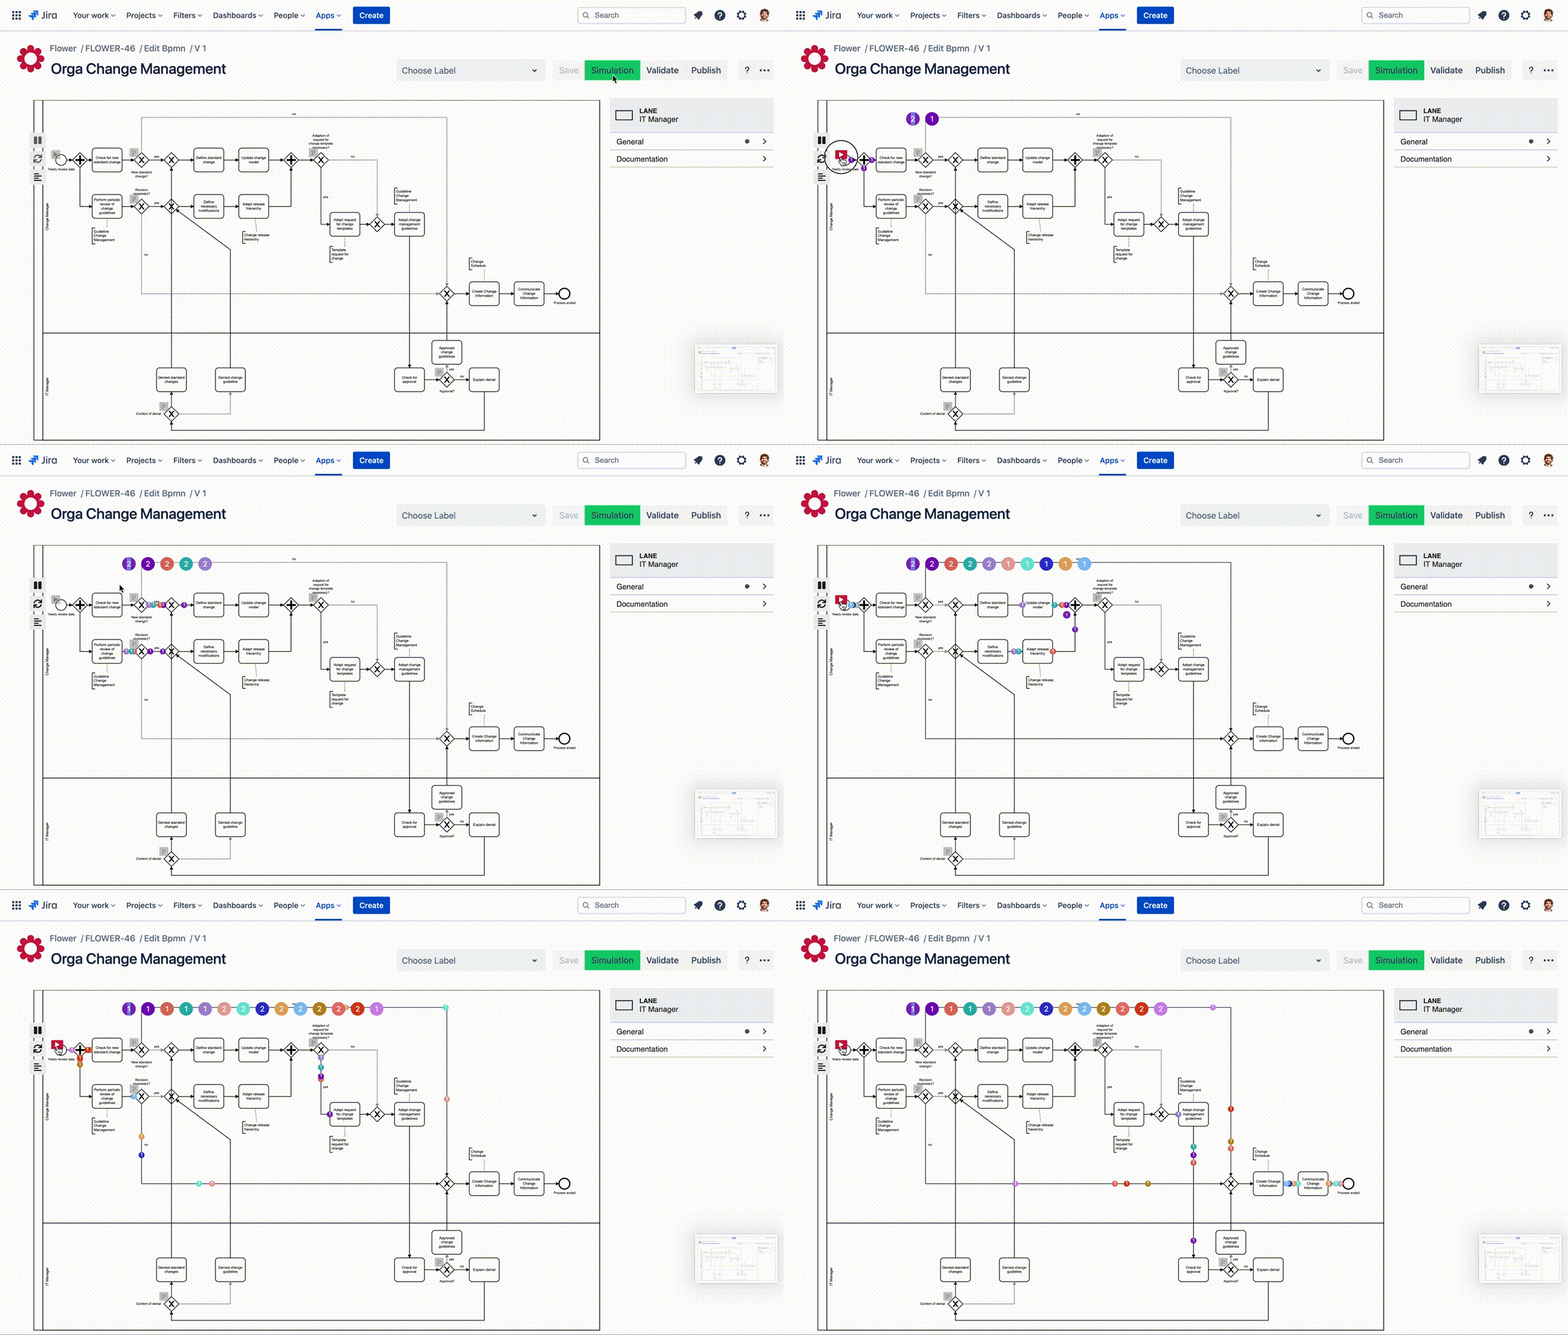
Flower Token Simulation
A picture is worth a thousand words—and a moving token is worth even more.
Token simulation helps you understand how a process runs. It shows:
- How tokens flow through the process.
- How activities and gateways behave.
- The impact of parallel and exclusive paths.
Token simulation supports most BPMN elements, but not:
- OR gateways
- Transactions
- Cancel events
- Compensation tasks and events
Process Validation
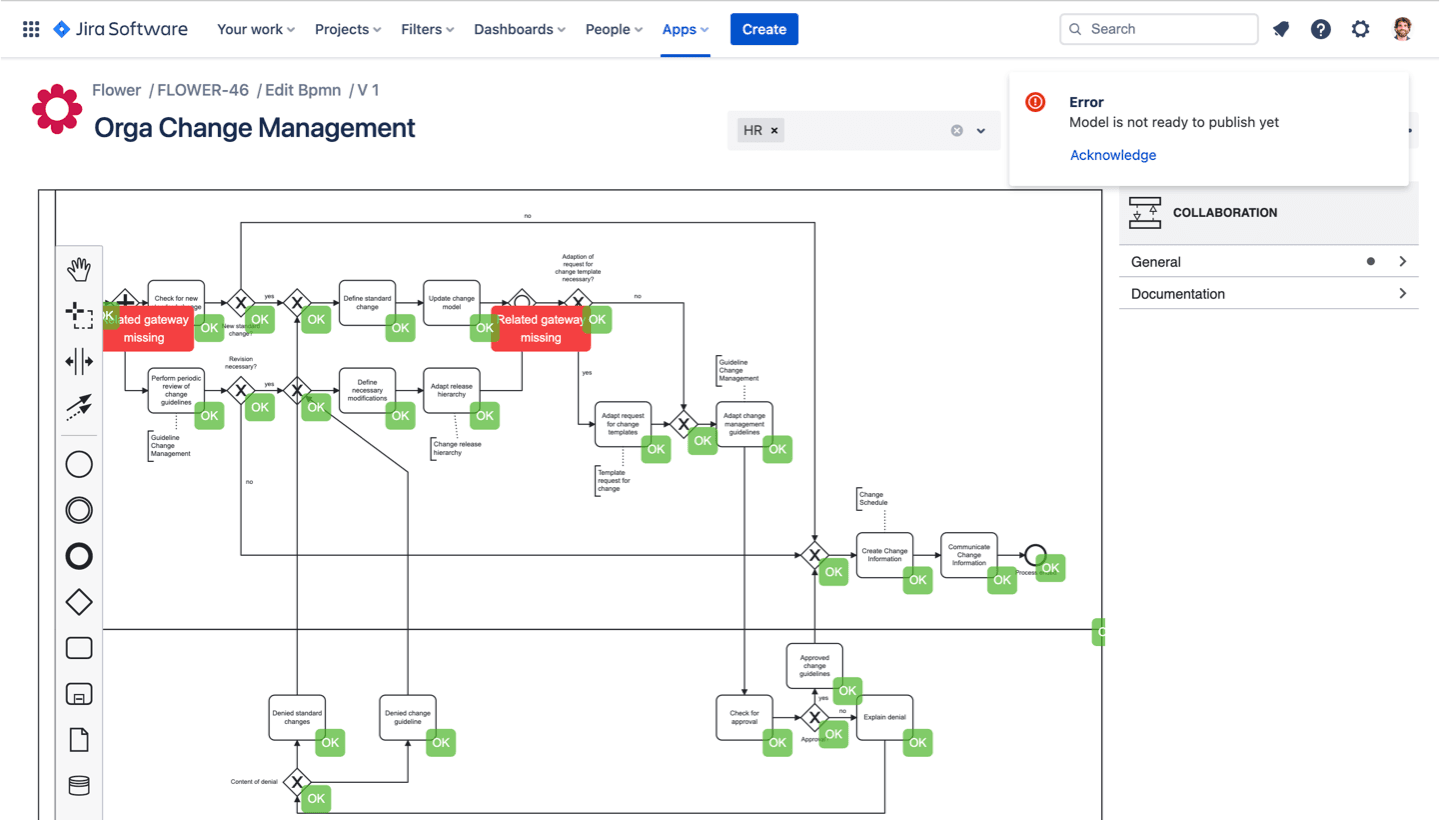
Before you publish, run the validation check. It tests your model against basic BPMN rules and shows issues that could affect execution.
- Green markers indicate valid elements.
- Yellow and red markers highlight potential issues.
Even if your model has warnings, you can still publish and execute it.
Publish Your Model
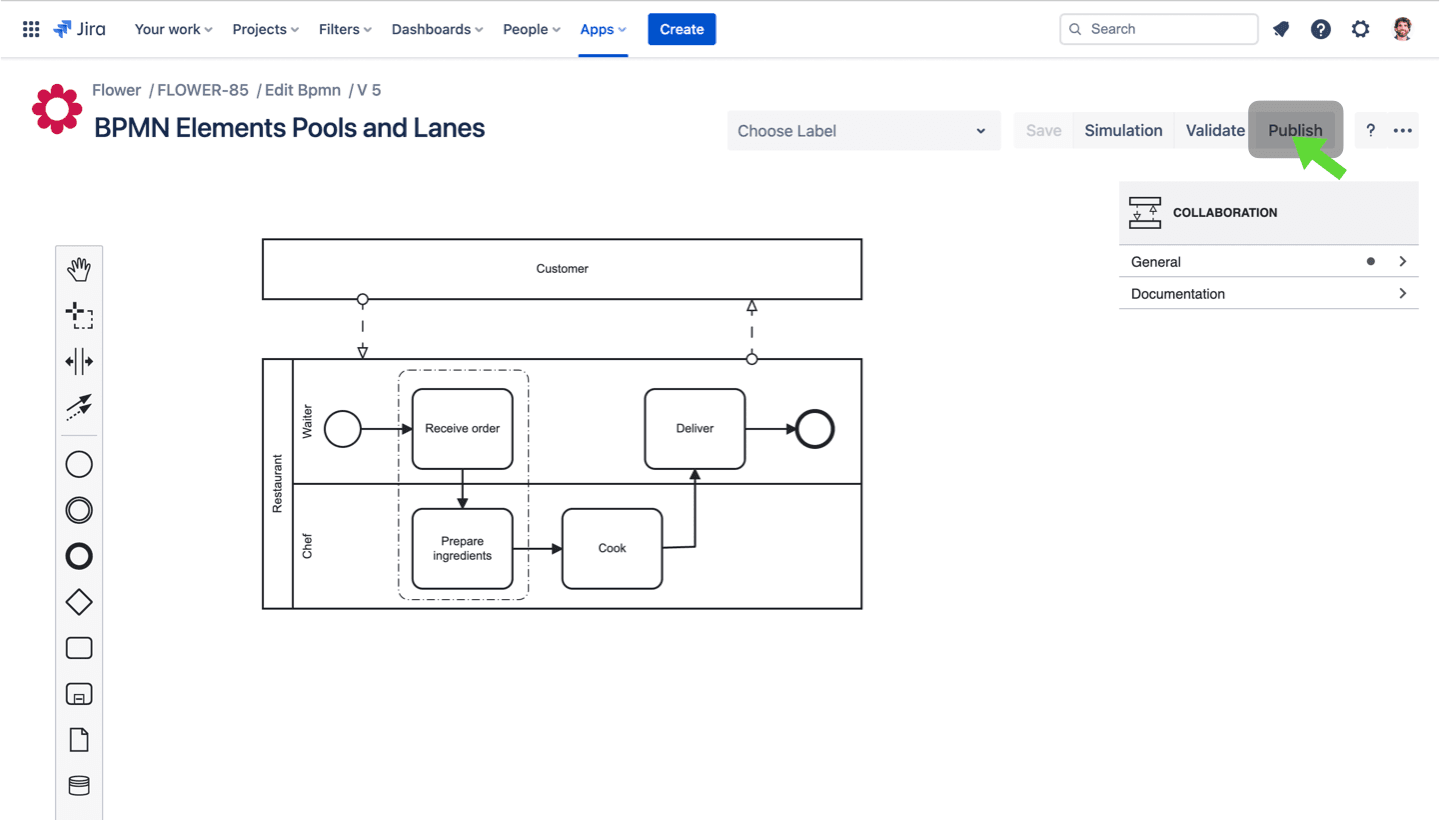
Every BPMN model in Flower is versioned. Your drawing is a draft until you publish it.
When you publish a model:
- A new version is created, and previous versions are preserved.
- New process instances use the latest version. Running instances are not affected.
Model Version Navigator
Flower keeps all published versions of a model. This allows you to:
- Revert to a previous version if necessary.
- Compare versions to track how the process evolved.
To browse previous versions, click “Versions” in the three-dots menu of the Flower BPMN modeler.
What’s Next?
- Get Started with Automation: Run your model as a process and track it in Jira.
- Setup Guide: Configure the Jira space and work types for Flower.
- User Tasks: Learn how activities become Jira work items.
Ready to Model Your First Process?
Flower BPM makes it easy to document, optimize, and execute your business processes directly in Jira.
Start experimenting with BPMN and bring structure to your workflows today! 🚀